Stripe's API is well-documented. But the docs don't show you how to wire everything together in Next.js 15 App Router. They don't tell you which pieces are Server Actions, which are Route Handlers, or where webhooks fit. This guide does.
This guide covers the full flow: pricing page → Checkout → webhook → database → customer portal. Every section explains the decision before showing the code, so you understand what you're building and why each piece belongs where it does.
The short version
Checkout → webhook → database, in that order
- Create a Checkout Session in a Server Action and redirect the user to Stripe
- Listen to Stripe events with a Route Handler (
POST /api/stripe/webhook) - Verify the webhook signature — reject anything that doesn't match
- Store subscription state in your database from the webhook, not from the Checkout redirect
- Give subscribers access to the Customer Portal to manage billing
Assumes familiarity with Next.js 15 App Router and basic Stripe account setup.
Works with stripe npm package v16+ and Next.js 15.
The mental model
Stripe has two main integration patterns:
- Checkout — hosted by Stripe, handles the payment form. You create a session server-side and redirect the user.
- Elements — you build the payment form yourself. More control, more code, more PCI compliance responsibility.
For most SaaS products, Checkout is the right choice. It handles 3D Secure, tax calculation, and international cards out of the box.
The flow looks like this:
- User clicks "Subscribe" on your pricing page
- Server Action creates a Checkout Session and returns the URL
- User is redirected to Stripe's hosted checkout page
- User completes payment
- Stripe sends a
checkout.session.completedwebhook to your Route Handler - Your webhook handler updates the database
- User is redirected to your success URL
The critical insight: never trust the redirect URL to confirm payment. The success URL is just a URL — nothing prevents anyone from typing /dashboard?checkout=success directly into their browser without ever opening their wallet. Stripe has no way to enforce that the URL is only reachable after a successful payment. The webhook, by contrast, is sent by Stripe's servers and carries a cryptographic signature that you verify server-side. That makes it the only authoritative signal that a payment actually completed. Your database must be updated from the webhook, full stop.
Setup
You need two things before writing any application code: the official Stripe Node.js library installed as a dependency, and your API keys available as environment variables. The stripe npm package is Stripe's first-party SDK — it provides fully typed methods for every Stripe API resource and handles request signing automatically.
npm install stripeThe three keys below cover distinct responsibilities: STRIPE_SECRET_KEY authorizes server-side API calls, STRIPE_WEBHOOK_SECRET verifies incoming webhook payloads, and NEXT_PUBLIC_STRIPE_PUBLISHABLE_KEY is safe to expose to the browser if you ever use Stripe.js or Elements client-side.
# .env.local
STRIPE_SECRET_KEY=sk_test_xxxx
STRIPE_WEBHOOK_SECRET=whsec_xxxx
NEXT_PUBLIC_STRIPE_PUBLISHABLE_KEY=pk_test_xxxx
You can find STRIPE_SECRET_KEY and NEXT_PUBLIC_STRIPE_PUBLISHABLE_KEY in the Stripe Dashboard under Developers → API keys. The webhook secret (whsec_xxxx) is generated separately — either by the Stripe CLI during local development, or in the Dashboard under Developers → Webhooks when you register a production endpoint.
Get the webhook secret by running the Stripe CLI:
stripe listen --forward-to localhost:3000/api/stripe/webhookThe CLI prints the webhook signing secret. For production, create a webhook endpoint in the Stripe dashboard pointing to your deployed URL.
In Next.js — especially with the App Router's serverless model — each cold start creates a new module scope. Without a singleton, you risk instantiating multiple Stripe clients in the same process during local development, or in the same serverless container during high traffic. A module-level export means Node.js caches the module after the first import, so every file that imports stripe shares the same instance. This avoids redundant initialization work and keeps your API version pinned consistently across the entire application.
// src/lib/stripe.ts
import Stripe from "stripe";

export const stripe = new Stripe(process.env.STRIPE_SECRET_KEY!, {
  apiVersion: "2025-01-27.acacia",
  typescript: true,
});
The apiVersion field pins your integration to a specific Stripe API version. This matters because Stripe occasionally introduces breaking changes in new API versions — pinning ensures that a Stripe-side update never silently changes the shape of objects your code depends on. When you're ready to upgrade, you change the version string deliberately, review the migration guide, and test — rather than discovering a regression in production.
Creating a Checkout Session
A Server Action in Next.js 15 runs exclusively on the server, which means your STRIPE_SECRET_KEY is never sent to the browser, never appears in a client bundle, and never shows up in network requests the user can inspect. Unlike a traditional API route, a Server Action can call redirect() directly — no client-side navigation logic needed. It also requires no separate route.ts file; the action lives alongside your components and is invoked as a plain function call.
// src/app/actions/checkout.ts
"use server";

import { redirect } from "next/navigation";
import { stripe } from "@/lib/stripe";
import { createClient } from "@/lib/supabase/server";
import { absoluteUrl } from "@/config/site";

export async function createCheckoutSession(priceId: string) {
  const supabase = await createClient();
  const {
    data: { user },
  } = await supabase.auth.getUser();

  if (!user) redirect("/login");

  // Look up existing Stripe customer for this user
  const { data: profile } = await supabase
    .from("profiles")
    .select("stripe_customer_id")
    .eq("id", user.id)
    .single();

  let customerId = profile?.stripe_customer_id;

  // Create a Stripe customer if one doesn't exist yet
  if (!customerId) {
    const customer = await stripe.customers.create({
      email: user.email!,
      metadata: { supabase_user_id: user.id },
    });
    customerId = customer.id;

    await supabase
      .from("profiles")
      .update({ stripe_customer_id: customerId })
      .eq("id", user.id);
  }

  const session = await stripe.checkout.sessions.create({
    customer: customerId,
    mode: "subscription",
    payment_method_types: ["card"],
    line_items: [{ price: priceId, quantity: 1 }],
    success_url: absoluteUrl("/dashboard?checkout=success"),
    cancel_url: absoluteUrl("/pricing"),
    subscription_data: {
      metadata: { supabase_user_id: user.id },
    },
  });

  redirect(session.url!);
}
A few things are worth unpacking here. The action first checks your profiles table for an existing stripe_customer_id — this prevents creating duplicate Stripe customers if the user attempts to subscribe more than once. When a customer is created for the first time, supabase_user_id is stored in the customer's metadata so the webhook can later look up which user to update. Critically, supabase_user_id is also added to subscription_data.metadata — not just the session metadata — because the subscription object persists beyond the checkout session and is what you'll receive in future customer.subscription.updated events. The final redirect(session.url!) sends the user directly to Stripe's hosted page without any round-trip to the client.
The CheckoutButton component needs to be a Client Component because it responds to a click event, and useTransition is the right tool here because it lets you track the in-flight state of the Server Action call without blocking the rest of the UI. Without useTransition, you'd have no way to show a loading indicator between the click and the Stripe redirect.
// src/components/pricing/checkout-button.tsx
"use client";

import { useTransition } from "react";
import { Button } from "@/components/ui/button";
import { createCheckoutSession } from "@/app/actions/checkout";
import { Loader2 } from "lucide-react";

export function CheckoutButton({ priceId }: { priceId: string }) {
  const [isPending, startTransition] = useTransition();

  return (
    <Button
      onClick={() => startTransition(() => createCheckoutSession(priceId))}
      disabled={isPending}
      className="w-full"
    >
      {isPending && <Loader2 className="mr-2 size-4 animate-spin" />}
      {isPending ? "Redirecting…" : "Get started"}
    </Button>
  );
}
The isPending flag is true from the moment the user clicks until the server responds with the redirect. Disabling the button during that window prevents double-submission — without it, a user who clicks twice could trigger two separate Checkout Sessions and end up with two Stripe customers.
The webhook handler
The webhook must be a Route Handler, not a Server Action, for a specific technical reason: Stripe sends a raw HTTP POST with a body of raw bytes, and it includes a Stripe-Signature header that is an HMAC computed over those exact bytes. If Next.js parses the body before your code sees it — which happens automatically with Server Actions — the byte sequence changes, the HMAC no longer matches, and every single webhook event fails verification. A Route Handler with request.text() reads the body as a raw string without any transformation. Additionally, webhooks arrive from Stripe's servers with no user session attached, which means you need a Supabase client initialized with the service role key rather than the standard SSR client — the SSR client relies on cookies from the user's browser, and there are no cookies here.
// src/app/api/stripe/webhook/route.ts
import { headers } from "next/headers";
import { NextResponse } from "next/server";
import { stripe } from "@/lib/stripe";
import { createClient } from "@supabase/supabase-js";

// Use service role — webhook runs outside of a user session
const supabase = createClient(
  process.env.NEXT_PUBLIC_SUPABASE_URL!,
  process.env.SUPABASE_SERVICE_ROLE_KEY!
);

export async function POST(request: Request) {
  const body = await request.text();
  const signature = (await headers()).get("stripe-signature")!;

  let event;
  try {
    event = stripe.webhooks.constructEvent(
      body,
      signature,
      process.env.STRIPE_WEBHOOK_SECRET!
    );
  } catch {
    return NextResponse.json({ error: "Invalid signature" }, { status: 400 });
  }

  switch (event.type) {
    case "checkout.session.completed": {
      const session = event.data.object;
      const userId = session.subscription_data?.metadata?.supabase_user_id;

      if (userId && session.subscription) {
        const subscription = await stripe.subscriptions.retrieve(
          session.subscription as string
        );

        await supabase.from("subscriptions").upsert({
          user_id: userId,
          stripe_subscription_id: subscription.id,
          stripe_customer_id: subscription.customer as string,
          status: subscription.status,
          price_id: subscription.items.data[0]?.price.id,
          current_period_end: new Date(
            subscription.current_period_end * 1000
          ).toISOString(),
        });
      }
      break;
    }

    case "customer.subscription.updated":
    case "customer.subscription.deleted": {
      const subscription = event.data.object;
      const userId = subscription.metadata?.supabase_user_id;

      if (userId) {
        await supabase
          .from("subscriptions")
          .update({
            status: subscription.status,
            current_period_end: new Date(
              subscription.current_period_end * 1000
            ).toISOString(),
          })
          .eq("stripe_subscription_id", subscription.id);
      }
      break;
    }
  }

  return NextResponse.json({ received: true });
}
constructEvent is the security boundary of the entire integration — it verifies the HMAC-SHA256 signature Stripe attaches to every request, and a 400 response on failure tells Stripe to retry later. When checkout.session.completed fires, the handler deliberately calls stripe.subscriptions.retrieve() rather than using the subscription data embedded in the session object; the reason is that the session snapshot may not include the full subscription detail (billing cycle anchor, trial end, item metadata), so you fetch the authoritative record directly. The upsert pattern on stripe_subscription_id means the handler is idempotent — if Stripe delivers the same event twice (which it does guarantee at-least-once delivery), a second upsert overwrites the same row rather than creating a duplicate, keeping your database consistent.
Always verify the webhook signature. Without constructEvent(), anyone
can send a fake checkout.session.completed event to your endpoint and get
free access. The signature check takes 3 lines and is non-negotiable.
Disable Next.js body parsing for the webhook route. By default, Next.js parses
request bodies — but constructEvent needs the raw bytes to verify the HMAC
signature. Reading request.text() directly (as above) bypasses the automatic
parsing.
The database schema
The fields you store in the subscriptions table are chosen to cover every access check your application needs without making an outbound API call. stripe_subscription_id is the primary lookup key for updates arriving from future webhook events. stripe_customer_id is what you pass to Stripe when creating a Customer Portal session so users can manage their billing. status is what you check on every protected route — active and trialing grant access, everything else does not. current_period_end lets you display billing renewal dates in your UI and implement grace periods if you want to give users a few days after a failed payment before locking them out.
-- supabase/migrations/002_subscriptions.sql
create table public.subscriptions (
  id                      uuid primary key default gen_random_uuid(),
  user_id                 uuid not null references auth.users(id) on delete cascade,
  stripe_subscription_id  text unique,
  stripe_customer_id      text,
  status                  text not null default 'inactive',
  price_id                text,
  current_period_end      timestamptz,
  created_at              timestamptz default now(),
  updated_at              timestamptz default now()
);

alter table public.subscriptions enable row level security;

-- Users can only see their own subscription
create policy "Users read own subscription"
  on public.subscriptions for select
  using (auth.uid() = user_id);
The RLS policy ensures that a logged-in user can only query their own subscription row — even if your client-side code has a bug that passes the wrong user_id, Postgres enforces the restriction at the row level. The webhook handler, however, uses the service role key, which bypasses RLS entirely; this is intentional because the webhook runs outside any user session and needs to write subscription data on behalf of any user without restriction.
Checking subscription status
Rather than making a live Stripe API call on every page load — which adds 200–400ms of latency and creates a hard dependency on Stripe's uptime — you read the subscription row your webhook already wrote to your own database. A Postgres query over a primary-key lookup takes under 10ms and is not affected by network conditions between your server and Stripe. The status field is kept in sync by the customer.subscription.updated and customer.subscription.deleted events in the webhook handler, so it accurately reflects the current state at all times. The two statuses that grant access are active (a paid, current subscription) and trialing (within a free trial period) — any other value, including past_due, canceled, or incomplete, should redirect the user back to the pricing page.
// src/app/dashboard/page.tsx
import { createClient } from "@/lib/supabase/server";
import { redirect } from "next/navigation";

export default async function DashboardPage() {
  const supabase = await createClient();
  const {
    data: { user },
  } = await supabase.auth.getUser();

  if (!user) redirect("/login");

  const { data: subscription } = await supabase
    .from("subscriptions")
    .select("status, current_period_end")
    .eq("user_id", user.id)
    .single();

  const isActive =
    subscription?.status === "active" || subscription?.status === "trialing";

  if (!isActive) redirect("/pricing");

  return <div>Welcome to the dashboard</div>;
}
The redirect on !isActive runs on the server before any HTML is sent to the browser, so there is no flash of protected content. Once the webhook fires — typically within a few seconds of the checkout completing — the status column updates to active, and the next page load passes the check. If you want to show a "processing payment" state on the success page while waiting for the webhook, you can poll the subscription status endpoint using useEffect and redirect once it turns active.
Customer Portal for subscription management
Stripe's Customer Portal is a hosted page that gives subscribers full control over their billing: they can upgrade or downgrade their plan, cancel their subscription, update their payment method, and download invoices — all without you writing a single line of billing UI. To create a portal session, you need the user's stripe_customer_id from your database, because that is what links your user record to their Stripe identity. The billingPortal.sessions.create call returns a short-lived URL that you redirect the user to immediately — the portal session expires quickly, so you generate it on demand rather than storing it.
// src/app/actions/portal.ts
"use server";

import { redirect } from "next/navigation";
import { stripe } from "@/lib/stripe";
import { createClient } from "@/lib/supabase/server";
import { absoluteUrl } from "@/config/site";

export async function openCustomerPortal() {
  const supabase = await createClient();
  const {
    data: { user },
  } = await supabase.auth.getUser();

  if (!user) redirect("/login");

  const { data: profile } = await supabase
    .from("profiles")
    .select("stripe_customer_id")
    .eq("id", user.id)
    .single();

  if (!profile?.stripe_customer_id) redirect("/pricing");

  const portalSession = await stripe.billingPortal.sessions.create({
    customer: profile.stripe_customer_id,
    return_url: absoluteUrl("/dashboard/settings"),
  });

  redirect(portalSession.url);
}
The return_url parameter tells Stripe where to send the user after they close the portal. Setting it to your settings page creates a natural return path — the user lands back where they started, and if they cancelled their subscription, the status change will have already propagated through the webhook by the time they arrive.
Using a <form action={...}> rather than an onClick handler calling a Server Action is a deliberate choice for progressive enhancement: the form submits via a standard HTTP POST, which works even before JavaScript has loaded, and avoids the need for a client-side event handler. It also means the button renders as a native form submit, which has correct accessibility semantics and works with browser autofill and keyboard navigation out of the box.
<form action={openCustomerPortal}>
  <Button type="submit" variant="outline">
    Manage billing
  </Button>
</form>
Full flow at a glance
| Step | What happens |
|---|---|
| Pricing page | User sees plans with CheckoutButton per price |
| Server Action | Creates Checkout Session, attaches Stripe customer ID, redirects |
| Stripe Checkout | User enters card details on Stripe's hosted page |
| Webhook | checkout.session.completed → upsert subscription in database |
| Dashboard | Server Component reads subscription status from database |
| Settings | Customer Portal for cancel/upgrade/payment method update |
Frequently asked questions
Should I use a Server Action or a Route Handler to create the Checkout Session?
A Server Action is cleaner — no separate file, no fetch call, direct redirect(). Use a Route Handler if you need to call this from a mobile app or external service that can't invoke Server Actions.
Why store subscription state in my own database instead of querying Stripe directly?
Speed and reliability. A Stripe API call takes 200–400ms. A database query takes under 10ms. Your dashboard loads faster, and it works even during a Stripe outage. The webhook keeps your database in sync.
How do I handle failed payments?
Listen to the invoice.payment_failed event in your webhook. Set the subscription status to past_due in your database and send a dunning email. Stripe's Smart Retries will attempt to charge again automatically — you just need to handle the status in your UI.
How do I test webhooks locally?
Use the Stripe CLI: stripe listen --forward-to localhost:3000/api/stripe/webhook. It proxies Stripe events to your local server and prints them in the terminal. Use stripe trigger checkout.session.completed to send test events without going through the full checkout flow.
Want this pre-built?
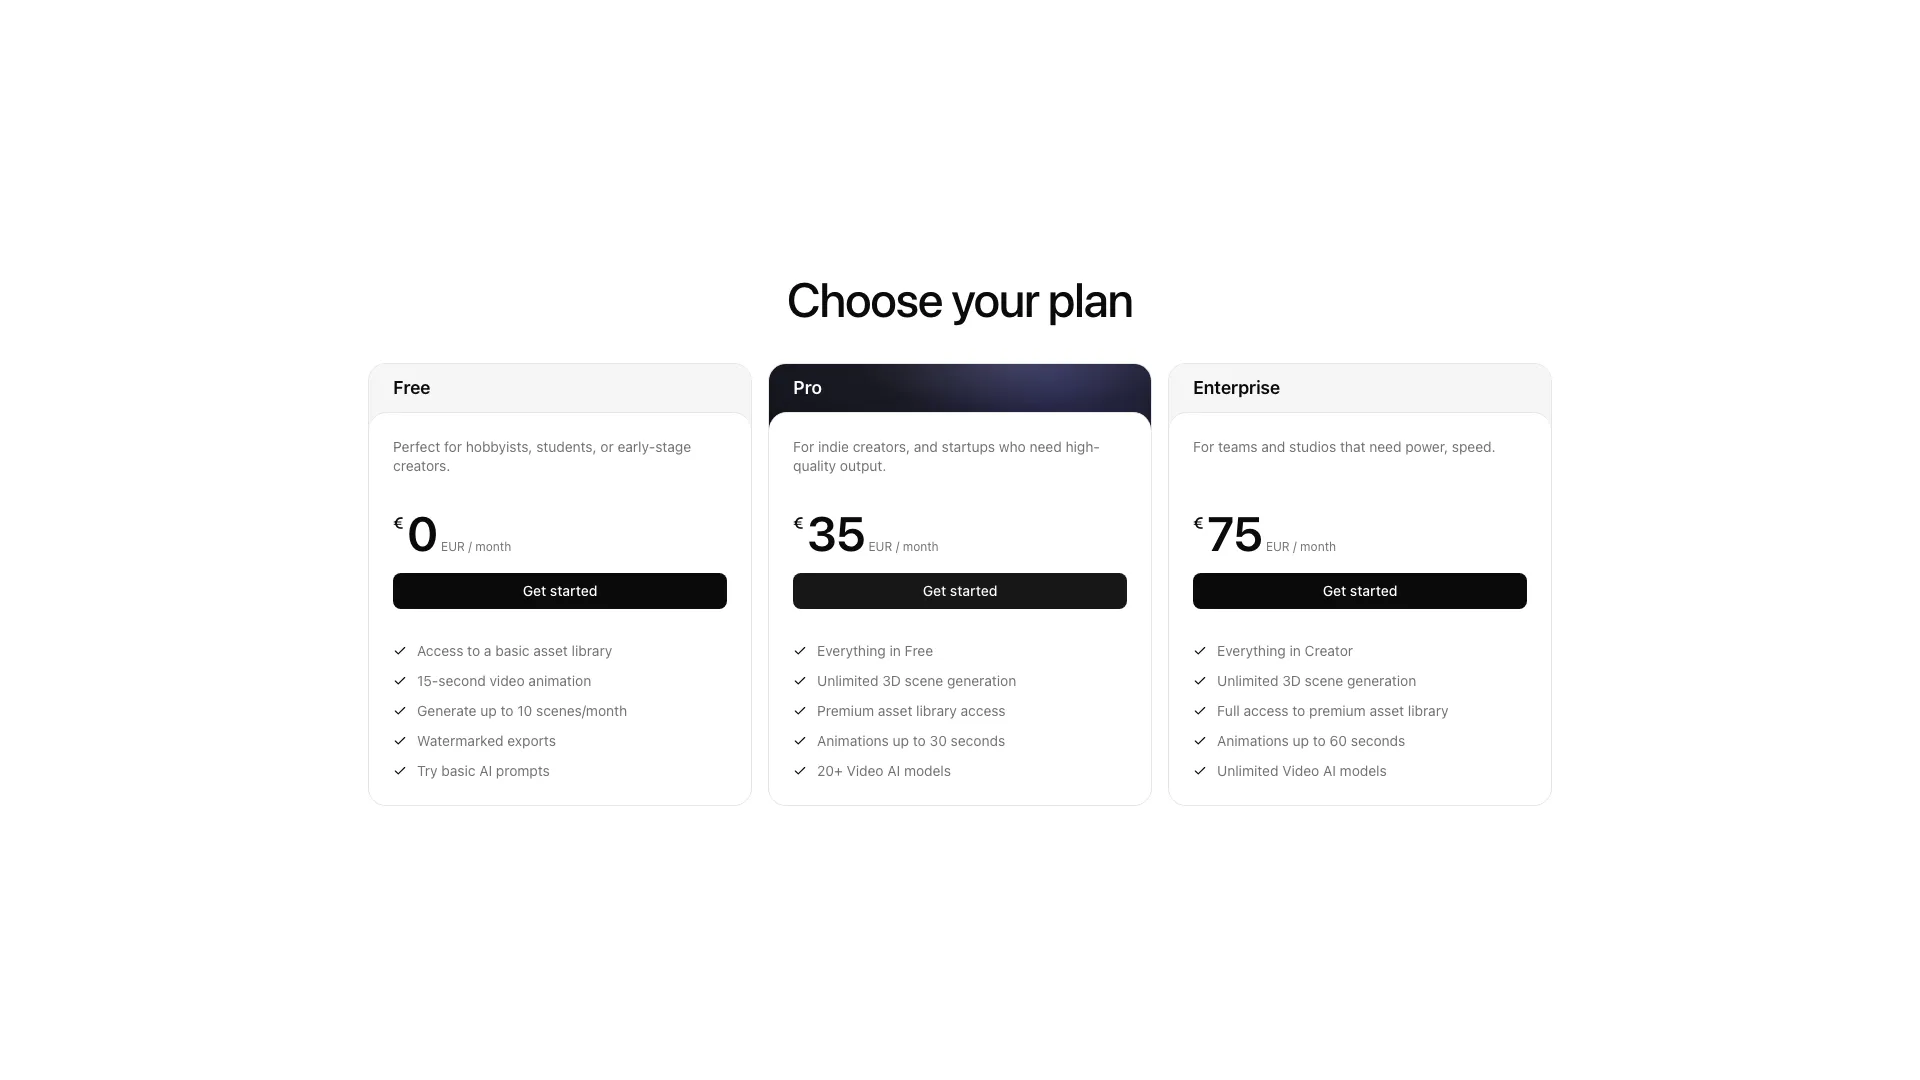
The pricing-stripe-01 block ships with a complete pricing UI, plan comparison, and checkout buttons ready to connect to your Stripe price IDs. Add your Stripe price IDs and env variables, wire up the Server Action, and your billing flow is live.